How better onboarding boosts your business’s efficiency
You’ve built your service offering, found a few clients, and you’re doing great as a solopreneur. The next big step? Create a client onboarding process that runs smoothly, delighting clients and freeing up your time. When your onboarding is seamless, you reduce confusion, increase client satisfaction, and set a strong tone for the entire relationship.
Let’s learn why a solid onboarding system matters, what the common friction points are, how to build your own step-by-step, which mistakes to avoid, and one immediate action step you can take today. And then you’ll be set to welcome your next client with confidence and start the project right.
Too many solopreneurs treat onboarding as an afterthought. You send an invoice, sign a contract, and start the work, then scramble to gather details, send files, and ask the same questions over and over. That means wasted time and a messy customer experience. In fact, industry research shows that poor onboarding decreases client retention and can cost 1–2 times the value of the project in lost time and goodwill.
When onboarding is weak, you might see misunderstandings about scope, late deliverables, scope creep, frustrated clients, and you working extra hours to patch things up. That drains energy and distracts you from your core work. On the flip side, when you have a defined onboarding system, you save time, impress your clients, and build trust before the “real work” even begins.
Onboarding Explained
The tip: Create a clear, repeatable onboarding system for new clients. This means mapping out the steps from “yes” to “ready to begin work,” defining what you’ll ask clients, when you’ll ask it, and what your internal steps are. Why it works: because you’re turning chaotic tasks into predictable processes. You’re freeing mental energy, reducing errors, and projecting professionalism.
Let’s unpack that. When you receive a “yes” from a prospective client, you’re entering a transition period: from sales to service. Without a system, that transition is manual and ad hoc. With a system, you can lock in the terms, gather necessary info (contacts, preferences, files), set expectations (timeline, communication rhythm), and kick off work with both parties aligned.
For example, you send a welcome email, include a link to a project intake form, schedule a kickoff call, and deliver a “what to expect” summary. On your side, you update your project tracker, assign tasks, and issue welcome assets. This sets the tone that you are organized and professional. According to service-business best-practice guides, onboarding is one of the few moments when you create a strong first impression and build clarity that protects your time and your client’s expectations.
In short, a successful onboarding system is a smart investment: less busywork, fewer misunderstandings, and more time doing the work you love.
Step-by-Step Implementation
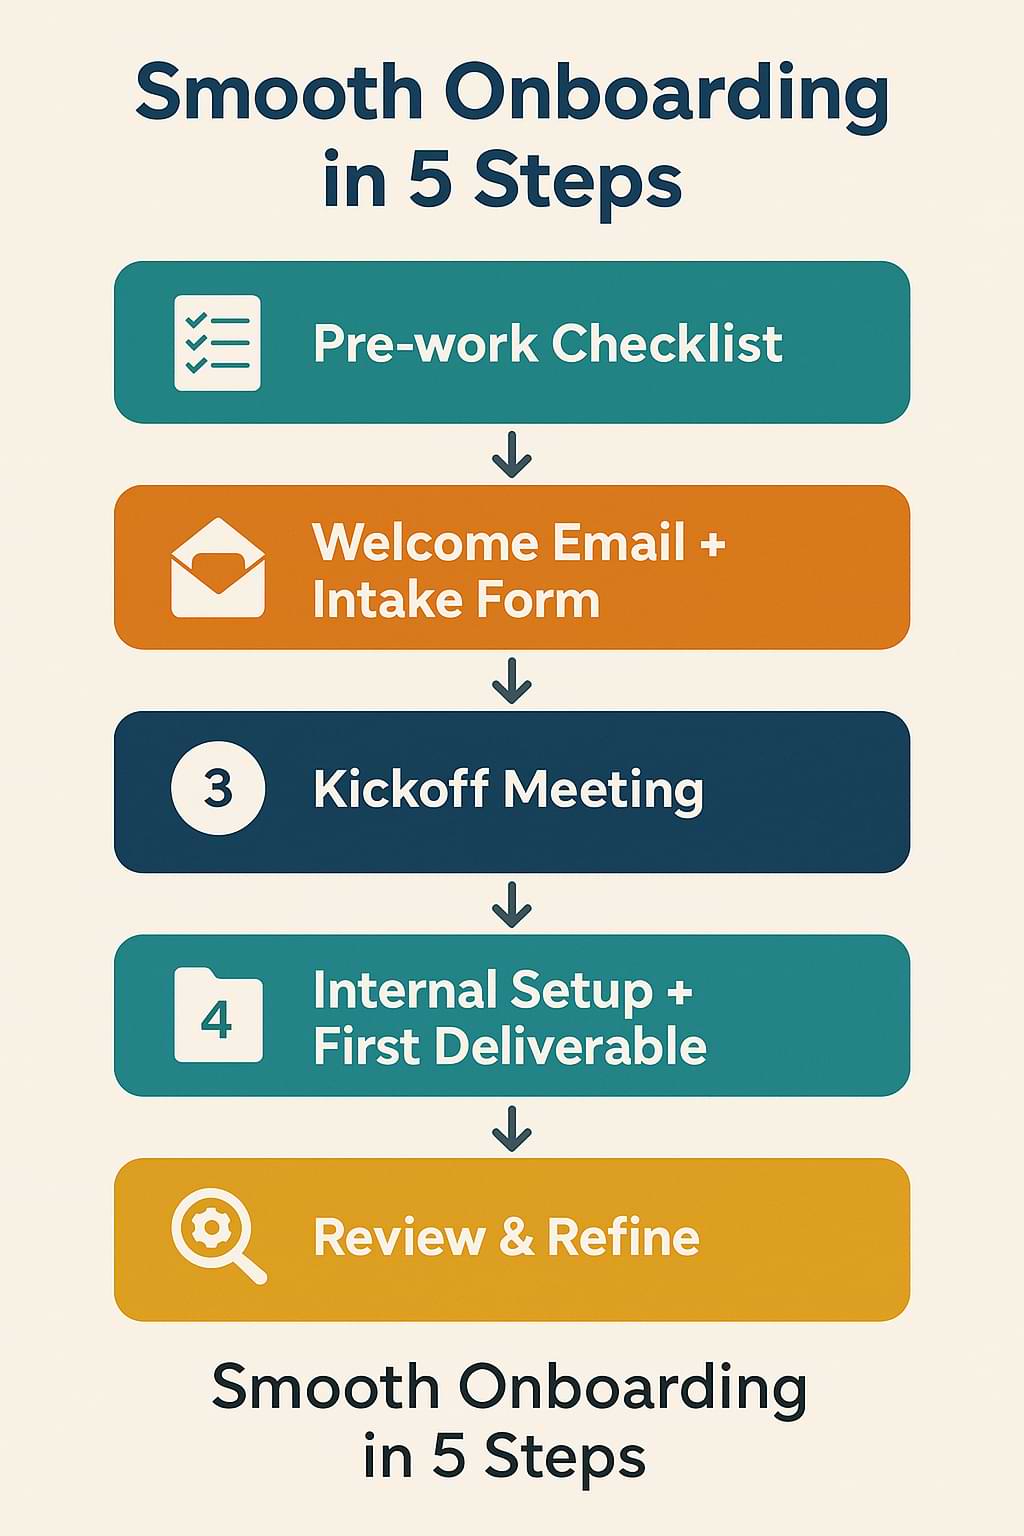
Step 1: Define your “pre-work” checklist
Start by writing down everything you need before actual work begins. Ask yourself: What do I need from the client? (e.g., contract signed, payment received, project brief completed, access to tools). What do I need internally? (e.g., project folder created, billing set up, tasks entered). Make a checklist you’ll use every time.
Step 2: Build a welcome email & intake form
Craft a standard welcome email that thanks the client, outlines next steps, attaches the contract or payment instructions, and includes a link to a client intake form (Google Form, Typeform, or similar). In the form, collect project goals, timeline, contact info, preferred communication, files you’ll need, brand assets (if relevant). This makes the “What do you need from me?” question automatic.
Step 3: Schedule a kickoff meeting and set expectations
Once you have the intake form returned, send a calendar invite for a kickoff meeting (15-30 minutes). Use the meeting to review the brief, set project milestones/timeline, agree on roles and responsibilities, confirm communication channels (email/Slack/phone), and summarize what happens next. After the call, send a short recap email so everything is documented.
Step 4: Internal setup & first deliverable
With the kickoff done, complete your internal setup: create the project folder, invite collaborators (if any), set up your tracker or project-management board (Trello, Asana, Notion), and enter key tasks/timeline. Then deliver your first “starter” deliverable (could be a brainstorm, a research summary, or a simple milestone) so the client sees progress early.
Step 5: Review and refine the onboarding process.
After you’ve onboarded a few clients using this system, spend 15-30 minutes reviewing: Did anything slow you down? Did clients ask the same questions? Did anything get missed? Update your checklist, forms, emails, and tools accordingly so each onboarding becomes smoother than the last.
Common Mistakes to Avoid
- Mistake 1: Sending a generic “thanks for working with me” email and then diving in without gathering client details. This creates gaps—like missing brand assets or unclear goals. Avoid by always using the intake form from Step 2.
- Mistake 2: Assuming the client knows what happens next and leaving milestones vague. If you don’t set clear expectations for the timeline and deliverables, the project can drift. Avoid by scheduling the kickoff meeting and sending a recap email.
- Mistake 3: Treating onboarding as a one-time fix, not a system you refine. If you don’t refine your process based on experience, you may continue to encounter the same inefficiencies. Avoid by reviewing Step 5 after each onboarding.
Action Step
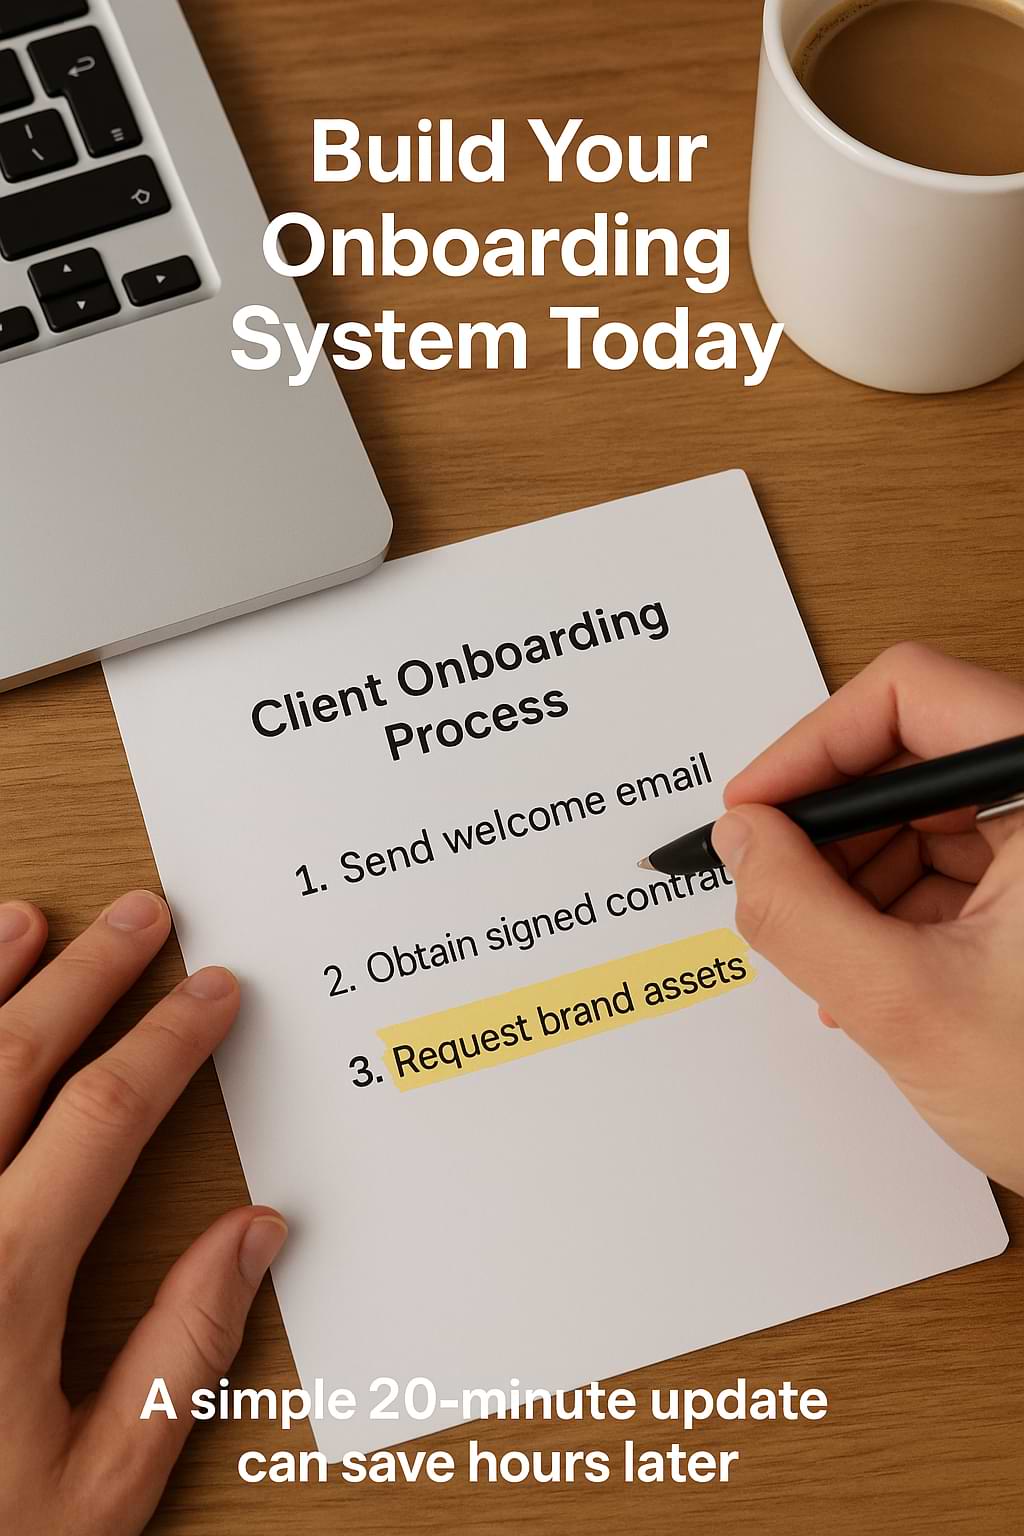
Right now: open a blank document titled “Client Onboarding Process.” Spend the next 20 minutes listing every step you currently take (from contract to first deliverable).
Then identify one missing item you’ve struggled with in past client projects (for example, “I often forget client brand guidelines” or “I don’t always collect systems access”). Add that missing item to your checklist. Save the document in your system. This small action starts your onboarding system and positions you for smoother client experiences moving forward.
Recap & Benefits
By implementing a smooth onboarding process, you are doing more than just starting projects nicely—you’re protecting your time, reducing confusion, delivering a better client experience, and building a foundation for repeatable, scalable operations. A clear onboarding system means fewer “where are we” emails, fewer missteps, less stress—and more time doing the actual work you enjoy. It helps you appear professional, instills client confidence, and sets a strong tone for successful projects.
Final Thoughts
Thank you for reading. Building a strong onboarding system is one of those operational improvements that pays dividends over time—and as a solopreneur, your time and reputation are two of your most valuable assets.
“The secret of getting ahead is getting started.” — Mark Twain
Here’s to onboarding your next client with clarity and confidence.
Solopreneurs: create a simple client onboarding checklist this week—send a welcome email, collect client info, schedule a kickoff & set expectations. Share on XSee my archive of Tips Tuesday articles.
his Blog Post is Brought to You by Blubrry
If you’re in need of a podcast host, let me recommend Blubrry podcast hosting. No contracts and you can cancel at any time. Plus they’ve redesigned their dashboard and it’s a beautiful and simplified. Competitive prices too! And if you already have a podcast host, migrate to Blubrry for free!
![]()